Archiving
We've seen how the archiving service is useful, let's see now how it is executed. This page will give you insight and examples on how to create archives of your logs, with the proper indexing method to be able to explore and extract it later.
Components
Archiving logs is done using a Storm Punchline. Three key elements are required :
-
A Kafka Input : The logs you want to archive needs to come from a kafka topic. That's because we use the kafka commit system to ensure all your logs will be processed "at least once". Let's explain.
Logs are archived in batches. If your punchline fails before the end of a batch, meaning before logs are successfully written to your back-end, you'll want your punchline to re-process these non-written logs when it'll start again. To do that, we'll commit the logs offsets to the kafka partition only after their batch has been successfully written. Therefore, when restarting the punchline, we'll start from the "last committed" offset, replaying the logs not successfully written. -
A File Output : This is where the archiving truly happens. The File Output receives the logs, select the fields to archive, encodes them in the correct format, compresses the results if needed, stores them in batches and writes these batches to your back end. Every aspect of this process can be customized by providing the correct settings in your configuration. We'll show a few examples here, but you can take a look at the full component documentation for more information.
-
An Elasticsearch Output : When the File Output successfully writes a batch, it publishes this batch's metadata, containing all the information needed in the future to explore and extract this archive. This metadata needs to be stored in an elasticsearch index in order to be processed or explored later.
Configuration
Kafka Input
As mentioned before, Kafka is the key to make sure you won't lose any data. Two things are required here.
First of all, you must set your start_offset_strategy to last_committed to make sure your punchline will replay non-committed logs
in case of failure. Next, you need to publish two reserved fields : _ppf_partition_id and _ppf_partition_offset.
These two are generated by the Kafka Input and will be used by the File Output to group logs into batches and name
these batches. Note that logs are grouped by partition, meaning a batch will never contain logs from different partitions.
Here's a simple example of a configuration :
- type: kafka_input
  settings:
    topic: my_input_topic
    start_offset_strategy: last_committed
  publish:
    - stream: logs
      fields:
        - log
        - _ppf_partition_id
        - _ppf_partition_offset
File Output
Here's where you configure your archiving process. We'll go step by step, going through the main settings.
Back end
Let's start with the basics : the destination back end. The File Output can write to three different type of back-end : Filesystem, Ceph and S3. Now, the interesting thing is that you'll only need to provide a few settings to configure your back-end. All other settings remain the same.
The destination setting will contain the address to your back end. The prefix you use will define the type of back-end you want. For a filesystem, you'll use the
file:// followed by the absolute path of your destination folder. For Ceph, you'll use ceph_configuration:// followed by the absolute path to your ceph configuration file.
Finally, for S3, you'll use http:// follow by the endpoint of your S3 cluster.
The credentials needed yor your back-end must also appear in the settings. Ceph's user key is user and S3 credentials are access_key and secret_key.
Here are some examples :
# Filesystem
destination: file:///tmp/archive-logs/storage
# S3
destination: http://127.0.0.1:9000
access_key: minioadmin
secret_key: minioadmin
# Ceph
destination: ceph_configuration:///etc/ceph/main-client.conf
user: client
You even have the possibility to set multiple destinations. Simply list your back-ends addresses in the destinations setting :
You can put any kind of back-end but keep in mind that all the destinations listed must be of the same type.
The File Output handle load balancing using the maximum_write and minimum_write settings. This way, you'll be sure to write
your data to at least minimum_write destinations but to at most maximum_write destinations. For each batch, destinations are
selected randomly to ensure archives are spread over all the destinations. See FileOutput documentation for more information.
destinations:
  - file:///tmp/archive-logs/storage1
  - file:///tmp/archive-logs/storage2
  - file:///tmp/archive-logs/storage3
  - file:///tmp/archive-logs/storage4
minimum_writes: 2
maximum_writes: 3
Destination
We now need to set where we want our data to be stored. We've already configured our backend, it's now time to name our file.
First of all, let's understand the concept of pool. This setting allows you to select the top folder (filesystem), bucket (S3) or pool (Ceph) you want to write your file into.
By default, this pool will be set with your tenant , and it is recommended to keep it that way for multi-tenancy purpose.
The main setting that defines your filename will be the file_prefix_pattern. It allows you to set the filename of your choice, with some parameters specific to each batch.
The list of these parameters can be found in the FileOutput documentation.
Of course, you can insert folder delimiter / in your pattern to create a folder hierarchy.
One very useful setting is the tags one. You can provide a list of fields to group logs on the corresponding values.
These fields may not be listed in the ones you want to archive and only used to group logs. You can use these fields in your filename,
using %{tag:<name>}. By default, the topic tag already exists. Its default value is your channel name.
To ensure uniqueness of each filename, a unique ID is generated and put right before the extension of the file.
Here's an example to S3 bucket mytenant sorted by topic, date and ip field :
pool: mytenant
topic: ip_detection
tags:
  - ip
file_prefix_pattern: %{topic}/%{tag:ip}/%{date:YYYY-MM}/puncharchive-%{partition}-%{offset}
Content
Now let's see how you can configure the content of your batch. The File Output gives you control on what you want to archive and how you want it to be encoded.
To set how many logs will be in your batch, set the batch_size setting. When this limit will be reached, batch will be written to destination.
Two more settings allow you to control when your batch will be written. The batch_expiration_timeout allows to force batch writing after some time of inactivity,
even if the batch size is not reached. The batch_life_timeout allows to force batch writing some time after batch creation, even if the batch size is not reached.
Both these timeouts can be set to 0 to deactivate them. They are quite useful when you want to set big batch size to limit the number of archives but you might face
some inactivity periods and don't want to wait a long time for the batch to get filled.
batch_size: 10000
batch_expiration_timeout: 30s
batch_life_timeout: 10m
fields settings. The provided fields must exist, or an exception will
be raised, and the punchline will stop.
fields:
  - ip
  - _ppf_id
  - _ppf_timestamp
encoding setting. Note that
each encoding has its own set of parameters. Csv encoding allows you to set the field separator used with the separator settings. Avro and Parquet
require an Avro Schema in the schema setting. See FileOutput documentation for more information.
Most of the time, you'll want to compress your data. This can be done using the compression_format setting. For csv, json and parquet, gzip value is handled,
while Avro uses snappy compression.
Here is a csv example :
encoding: csv
compression_format: gzip
separator: __|__
encoding: avro
compression_format: snappy
schema:
  type: record
  namespace: org.thales.punch
  name: example
  fields:
    - name: _ppf_id
      type: string
    - name: _ppf_timestamp
      type: string
    - name: ip
      type: string
Additional settings
In case you're doing filesystem, you can set the streaming setting to true to avoid loading a huge amount of data in RAM and directly write it in the target file as it comes.
See FileOutput documentation for more information. Note that Avro and Parquet automatically works in streaming mode.
A timestamp_field setting allows you to provide a timestamp field to index the earliest timestamp and latest timestamp for each batch. This information will be used later for extraction.
Example
Here is an example on how to write a csv to Minio :
- type: file_output
  settings:
    # Back End
    destination: http://127.0.0.1:9000
    access_key: minioadmin
    secret_key: minioadmin

    # Destination
    pool: mytenant
    topic: ip_detection
    tags:
      - ip
    file_prefix_pattern: %{topic}/%{tag:ip}/%{date:YYYY-MM}/puncharchive-%{partition}-%{offset}

    # Content
    batch_size: 10000
    batch_expiration_timeout: 30s
    batch_life_timeout: 10m
    fields:
      - ip
      - _ppf_id
      - _ppf_timestamp
    encoding: csv
    compression_format: gzip
    separator: __|__

    # Additional settings
    timestamp_field: _ppf_timestamp
  subscribe:
    - component: kafka_input
      stream: logs
  publish:
    - stream: logs
      fields:
        - metadata
ElasticSearch Output
The final step is to index metadata published by the File Output into an Elasticsearch index.
The only indication for this step is to choose an index name matching pattern *-archive-*, in order for elasticsearch
to use the metadata mapping provided by the punch.
For a full metadata example and description, see the File Output documentation.
- type: elasticsearch_output
  settings:
    index:
      type: daily
      prefix: mytenant-archive-
    document_json_field: metadata
    batch_size: 1
    reindex_failed_documents: true
    error_index:
      type: daily
      prefix: mytenant-archive-errors
  subscribe:
    - component: file_output
      stream: metadatas
We can only insist on how important this step is. Indexing metadata is mandatory for extraction and exploration. Getting this metadata back is extremely complicated, if not impossible, and extracting non-indexed archives always leads to trouble.
Full Example
Here's an example of a punchline storing csv with gzip compression into minio. Data extracted from kafka contains three
fields ip, _ppf_id and _ppf_timestamp :
version: "6.0"
type: punchline
runtime: storm
tenant: mytenant
channel: ip_detection
dag:
  - type: kafka_input
    settings:
      topic: ip_adresses_topic
      start_offset_strategy: last_committed
    publish:
      - stream: logs
        fields:
          - ip
          - _ppf_id
          - _ppf_timestamp
          - _ppf_partition_id
          - _ppf_partition_offset
  - type: file_output
    settings:
      destination: http://127.0.0.1:9000
      access_key: minioadmin
      secret_key: minioadmin
      pool: mytenant
      topic: ip_detection
      tags:
        - ip
      file_prefix_pattern: %{topic}/%{tag:ip}/%{date:YYYY-MM}/puncharchive-%{partition}-%{offset}
      batch_size: 10000
      batch_expiration_timeout: 30s
      batch_life_timeout: 10m
      fields:
        - ip
        - _ppf_id
        - _ppf_timestamp
      encoding: csv
      compression_format: gzip
      separator: __|__
      timestamp_field: _ppf_timestamp
    subscribe:
      - component: kafka_input
        stream: logs
    publish:
      - stream: metadatas
        fields:
          - metadata
  - type: elasticsearch_output
    settings:
      index:
        type: daily
        prefix: mytenant-archive-
      document_json_field: metadata
      batch_size: 1
      reindex_failed_documents: true
      error_index:
        type: daily
        prefix: mytenant-archive-errors
    subscribe:
      - component: file_output
        stream: metadatas
metrics:
  reporters:
    - type: kafka
Monitoring
Once our punchline configured and started, we may want to have some insight on how it's running. The File Output node provides a few key metrics to understand how the archiving is doing :
- The amount of Batches flushed
- The amount of Tuple processed. Note that this metric increase for every tuple processed, even if its batch has not been flushed yet.
- The amount of data written. This indicates the bytes flushed.
- The amount of tuple per batch. This allows you to monitor if your batch filling is optimized, or if you need to set a different timeout or batch size to reach the batch filling you want.
- The tuple processing time. A quick insight on the time require to process a tuple.
- The batch flushing time. A quick insight on the time require to flush a batch. This can highlight some I/O issues when writing to your device, for example.
- The compression rate. Allow you to check the compression efficiency. Of course, this is only updated when flushing a batch.
To use these metrics, make sure you include a Kafka reporter in your punchline configuration, as shown in the previous example :
metrics:
  reporters:
    - type: kafka
channelctl --tenant platform start --channel monitoring
To check on these metrics, a dashboard is provided with the punch resources.
You can import it using the punchplatform-setup-kibana.sh command :
punchplatform-setup-kibana.sh --import --pattern archiving_monitoring.ndjson
Now, you should find this dashboard in kibana.
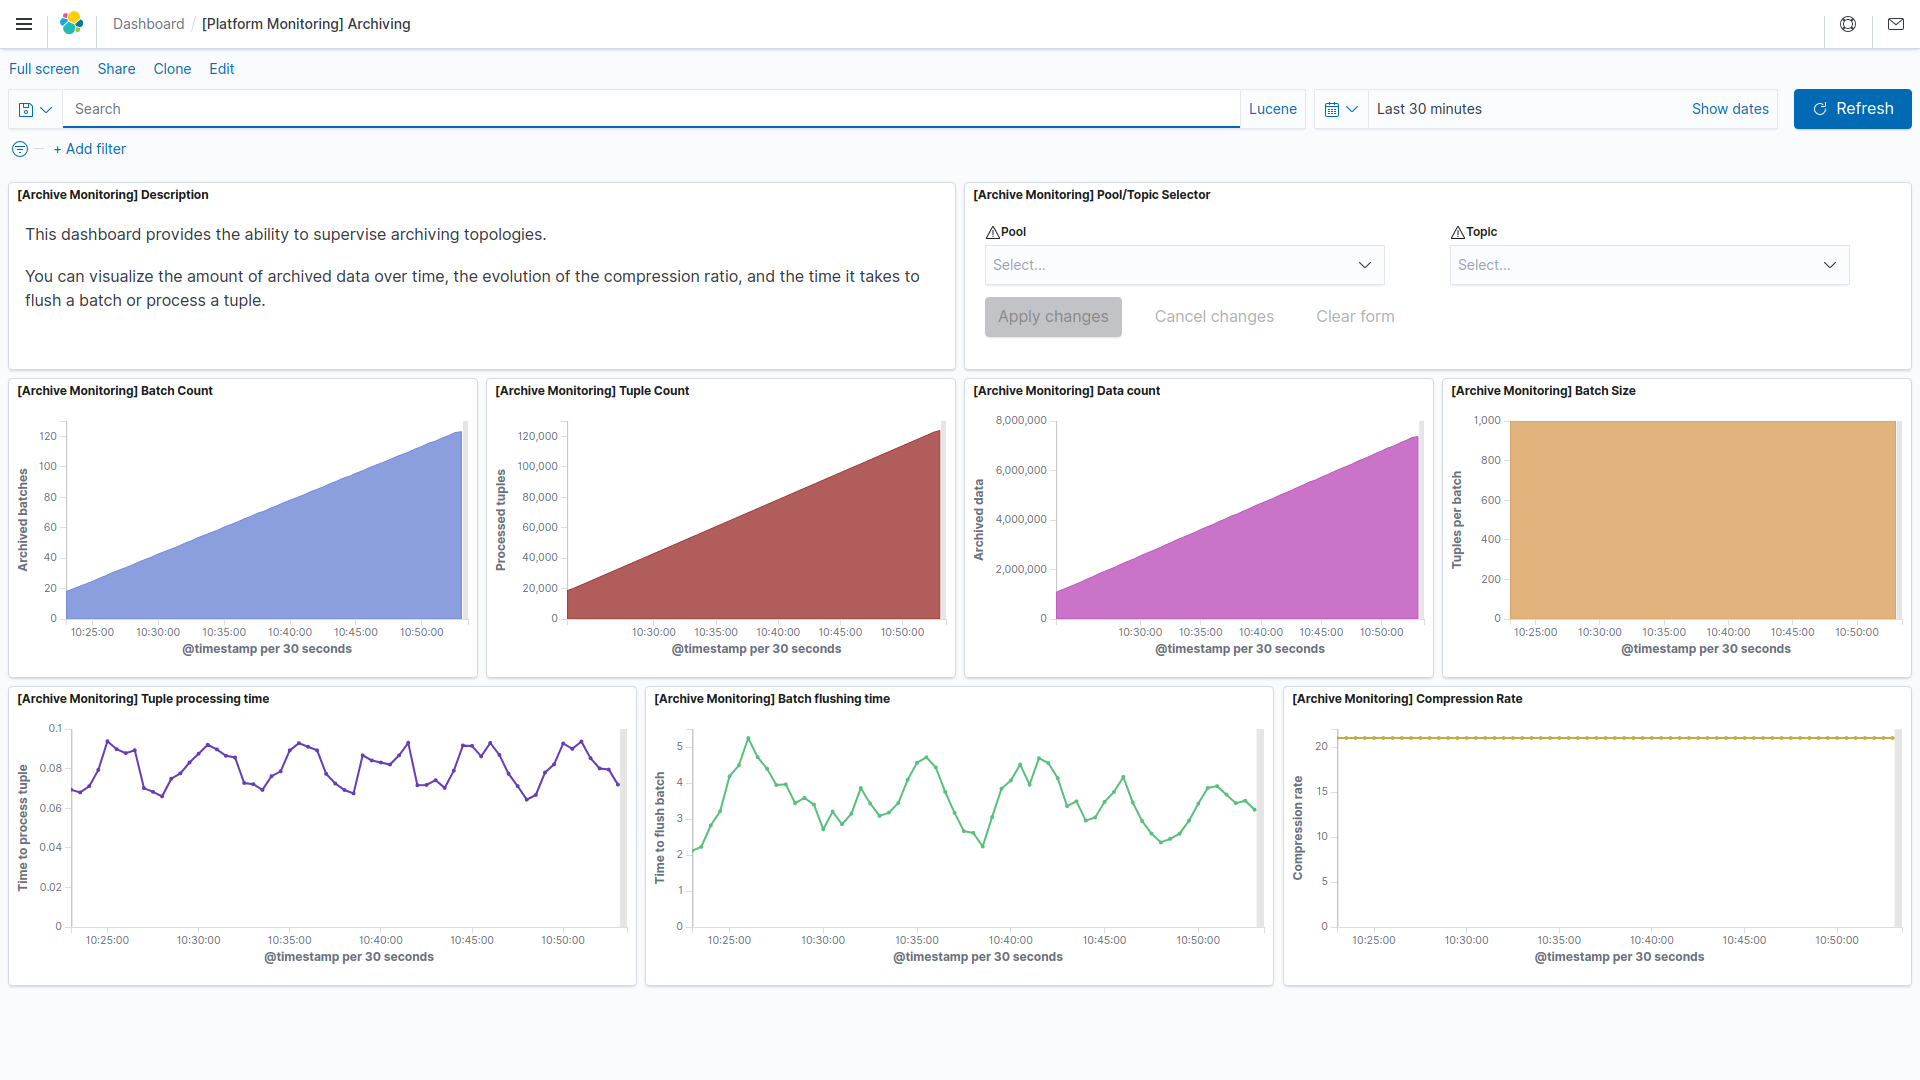
You can select a Pool and Topic to have more precise information.